I
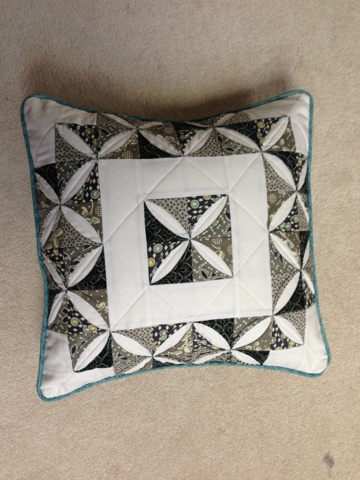
Long overdue, this pillow is a gift for Sheila. Why did it take so long?
Lexi has a new diet plan, and a la Richard Simmons, I devised a card system to help her track her portions. She and I designed these cards, which she decorated and laminated. The wallet is a redesign of those in my last post. I made a panel 7.5" tall x 18" wide with 10 pockets, set 1/2" apart.
Now, if you don't want to make one, ignore this next section because it will not interest you in the least. Fold the panel of pockets in half width-wise, right sides together, and sew along the top and bottom, 1/4" from the raw edge, ONLY the 3 1/2" against the folded edge. Clip the corners, top and bottom, and turn right side out. Press.
Topstitch along the folded edge, and along the top of the finished section, making sure not to exceed 3 1/2" from the topstitching along the folded edge. Now, stitch a vertical line from the top to the bottom, 3 5/8" from the topstitching along the folded edge. This closes the pockets along the binding edge of the wallet. This is what the pockets look like if you open up the sides:

Now, you will notice tha the sides are about an inch wider than they need to be. I did that to make any errors in the measurements less dire, since I was making this up as I went along. I decided to leave that measurement alone because trimming the extra now makes the whole thing neater and easier in the next step, which is a little tricky.
If you place the pockets, folded edge to the left, on your cutting surface, you will notice that the bulk of the pockets makes the section a little wider on the bottom v. the top edges. Line this baby up straight, even though the left edge will be a little off at the bottom. Trim the two sides by cutting a straight line, 4 5/8" from the vertical seam that you sewed to define those other pockets. It looks like the total width is about 8 3/4". (righties: hold onto the wallet tight by resting your left forearm down on the left side of your ruler, with your left hand holding down the ruler well above the wallet, and not overhanging the right side of the ruler, so your rotary cutter has no chance of meeting fingers. I have only sliced into my left forefinger once, and I hope never to experience that again. Good thing I'm not Yo Yo Ma or my audience would have been disappointed for a several weeks! lefties: as you have had to do your whole life, mirror image these photos.)

Now, out of your exterior fabric, cut a piece 7.5" tall by 9"wide. Cut two 3" squares. Interface as the other pattern has you do, and attach the tab with velcro as in the other wallet. Attach the velcro to the exterior panel, and place, right sides together, over this pocket thing, with the middle "page" off to the right side. Match up corners and sew the left edge, along with no more than 2" of the left edge of the top, and no more than 3" of the left edge of the bottom, backstitching at the start and stops for stability.
Now, slide your middle page into the part you just sewed, and line up the right side of the exterior with the right side of your pocket panel. Sew that as you did the left side. You are leaving a nice-sized area on the top to turn right side out, and leaving a tiny opening on the bottom to make the binding lay flat for topstitching later. Clip corners and turn that baby inside out, poking the corners out with a blunt instrument to make nice corners. Press and topstich the left side and right side separately. Now, sew two vertical lines, 3 5/8" from the sides topstitching on each side to make the pockets on the exteriors a little bit more than 3 1/2" wide. woohoo!!
Stash Used: 1 yard for the pillow, 3 for 4 wallets
Stash Used total: 149.7 yards
Stash Acquired: 0 yards
Stash Acquired Total: 178.75 yards