Monday, June 1, 2015

Fabric Stash Organization *

* or, "How I cram maximum  fabric in my storage space."

I've been asked how I organize my knit fabric in neat piles, which make visualization easy and access reasonable. If you really want quick and efficient access to your fabrics, you should store each fabric vertically like books in a bookshelf. My shelves are not that adjustable, and I'd end up wasting some of my precious storage space, so I choose to store in piles. I've categorized my quilting fabrics roughly by color or collection, but my knits collection seems to be growing too fast so it's pretty random in there.
This is the product I bought on Amazon. Click here to buy boards It's meant for die-hard comic book collectors to display and store their precious comics in special acid-free baggies. Well, we collect something precious, too. It's FABRIC! The boards are acid free and if you want to store your fabric vertically, you will want to leave the boards in each piece of fabric for support. I often slide mine out after using it for folding the fabric, but for flimsy fabric, I will sometime choose to leave it in. I'm also too cheap to buy more, and I have more than 100 pieces of fabric. Trust me, a lot more.

Fold the fabric lengthwise with selvage edges together. Then fold again, but under-fold by a little bit, maybe 1/2", so that the gnarly selvages are hidden by the neatly folded edge. If your knit is very curly, under-fold by more, maybe 1 to 1-1/2," depending on how much curling there is.  In this picture, the selvage is seen on the left side, slightly inside the first fold. 
Now, lay two pieces of comic board, side by side but overlapping a lot, so that the edges hang out beyond the fabric by an inch or so. 

Roll up the fabric on these two boards, uncurling the curling edges as much as you can as you go. If it's really curly, you can roll a few times, and then reach your fingers into the edge to unroll the selvage. It's not perfect, but these are knits, and there's only so much you can make them behave. This knit I'm using is a cool max knit, so it's not curly. A good cotton lycra will curl a lot and you have to choose your battles with it. Let it curl a little so you can move on!

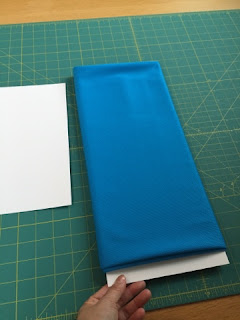
If you are going to take your comic boards out, do it now. If not, it's possible to push it in to make it less visible. I definitely take out at least one. I'm going to need all the boards I can get!
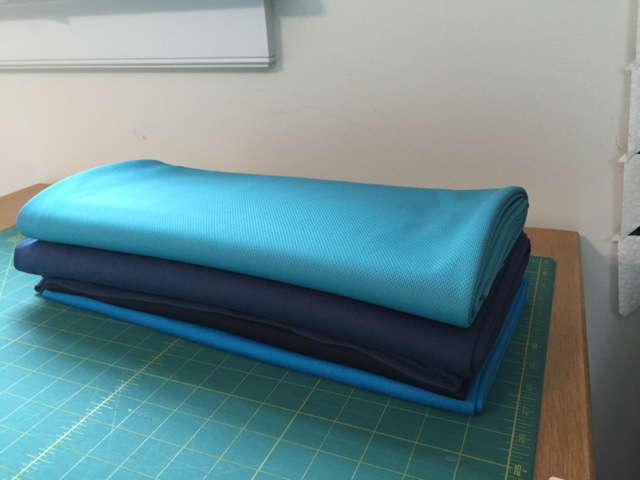

Now, stack the fabric you've rolled neatly, lining up the prettiest ends. Since fabric widths are variable, the back end isn't going to be so neatly lined up, but the side you will see should be as tidy as you can get it. Stack on your shelves as space-efficiently as you can. I leave a few inches free at the top of my piles because these built-in shelves aren't finished on their undersides, and bending down to get these babies out is a little awkward.
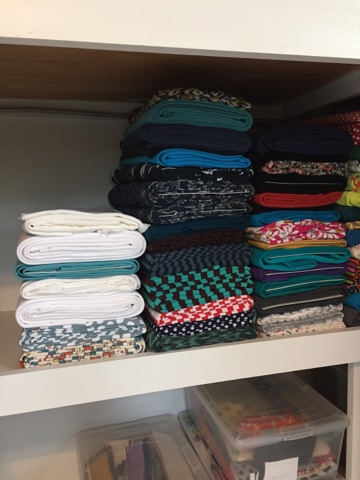


For woven fabrics, (I'm talking about quilting cotton, which is universally 42-44" wide,)

Again, fold the fabric with selvage edges together. Do not fold again at this point. Lay out the fabric with selvages on the left side, and use your favorite 6 or 6.5" by 24" ruler, or something close to these measurements.
Roll the fabric up on this ruler, fairly tightly, making sure you are keeping the edges straight. Use your hands to flatten out as you go.


Slide the ruler out carefully, and fold the fabric in half making a neat folded edge for display.

Stack in piles neatly. I do not use this method for more than 3 continuous yards. The last fold ends up distorting the fabric if the rolled fabric is too thick. I omit that last fold and keep large pieces of fabric  stacked separately in a deep cabinet. These are usually pieces meant for backings or whole bolts of solids meant for many quilt backgrounds. 

Now, go back to creating; all this tidying is not going to get that fabric sewn!


Sunday, May 17, 2015

What a world!

I'd like to introduce a new feature in my blog, the "What a world" commentary. It's named in honor of my late mother, who regularly exclaimed this very thing, every time she discovered something new and fabulous in her world. For example, downloadable audiobooks would qualify, or cruise control, or three dollar breasts! I suppose I ought to explain that last...
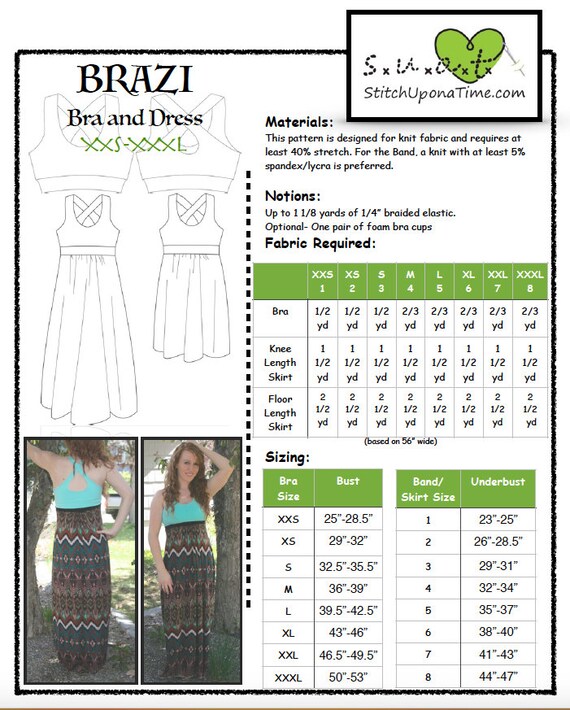
I've been delighted for the last few years that I can buy a bra for $20 that contains the one part of the whole bra thing that I lack...breasts. This alone might have given me the confidence to enjoy high school, had it been available back in the day. But now, I discovered while exploring this fabulous new sewing pattern, (more later,) I can have breasts for the low, low price of $2.95, or as little as $2.45 if I buy in bulk. "Bulk breasts," you ask? Well, stick with me, friend because the best is yet to come!
So, Wawak Sewing sells sewing notions at a terrific price, and if you just need a single pair of push-up bra cups, it can be yours for only $2.95. If, however, you intend to sew them into multiple garments, or are in the sewing industry, you can choose from an assortment, and on a sliding scale, the price can drop to as low as $2.45 if you want 24 or more. They're really accommodating; you can buy in any color or size available, and the total number you buy in any variety counts. Check this page out:
They also have regular foam cups that don't add volume, inexplicably, for a little more money.

So, on to the pattern. It's by an independent pattern designer named Jennifer Barroso, whose company is called Stitch Upon a Time. The pattern is the Brazi, which makes a sports bra and/or dress, long or short. I've even modified it into a sports top, so I don't have to pull a shirt on over a sports bra. I absolutely love this pattern, and based on the Facebook group dedicated to this pattern company, it is universally adored, (with rare exceptions for the very, very, very most endowed gals who are shorter in stature, I've noticed.) 
You can buy this pattern on etsy...MakeMyOwnSportsBras!

Stay tuned for more bras, sports tops, and dresses. I've got a mad knit stash going!

This one was my first. It's a total failure; note the side boob thing going on there...I need more coverage, and more stretch in the straps. I've got more boob out than in. 


ahh, much better. I think I screwed up the back though; I cut the back piece with the wrong edge on the fold. Sometimes our mistakes are so stupid that we are entertained.

I'd love to be able to exercise in a sports bra, but all that belly flab just distracts me and I am drawn to curl up and cover it. So...
I made another sports bra, this time attaching shirt panels below. Phew! Now that I can't see my belly, I might be able to exercise, just a little.

Oh, and while we're making underwear, check out these boxers!!! 


The pattern is also Stitch Upon a Time. I highly recommend it.


This top is from Seamworks Magazine's pattern, Aberdeen. I also made it with a rayon jersey grey stripe, which isn't photographed and currently is in the hamper with toothpaste on it. oops.

So, what have YOU been doing?!

Tuesday, March 17, 2015

Three Bags and a bonus


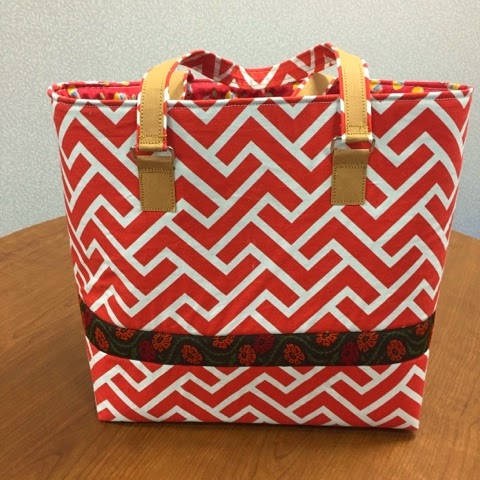
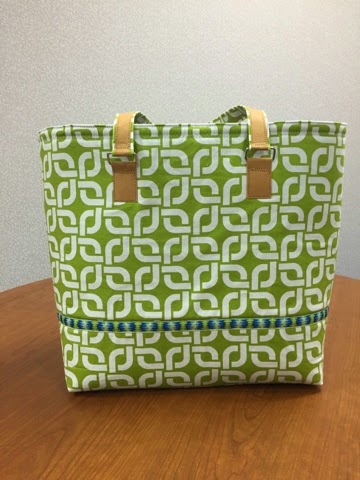
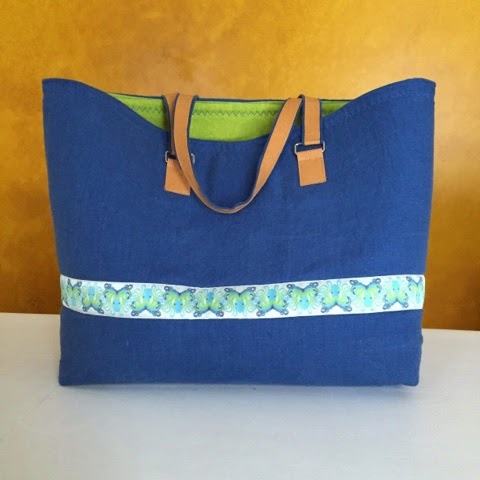
Laurie and Suzanne, much-loved team members at the Breast Care Center, have recently had urgent surgery and quick recoveries. Both are back at work, but their infirmity was so brief that there wasn't time to make them the usual post-operative care packages that have become tradition. So, though belated, these are their bags:
This one is for Suzanne:

and this one is for Laurie:

This one is for me, since fortunately there were no other major illnesses.

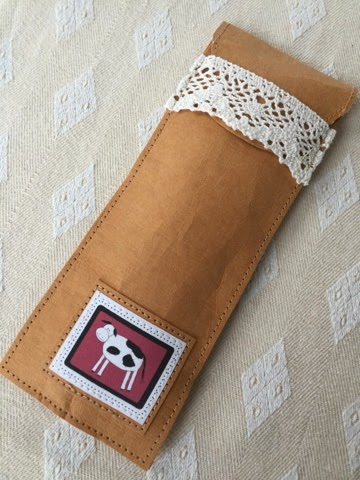
This is a little pencil case made from Kraft-tex, a paper product that is virtually indestructible. I'm looking forward to making more items from Kraft-tex, as it's a textile that intrigues me greatly and is relatively inexpensive. I first purchased 2.5 yards, but since have ordered a few BOLTS and a little more. The new colors will ship in the summer, and I'll spend the interval making some cool office products out of the the natural color bolt I just opened.

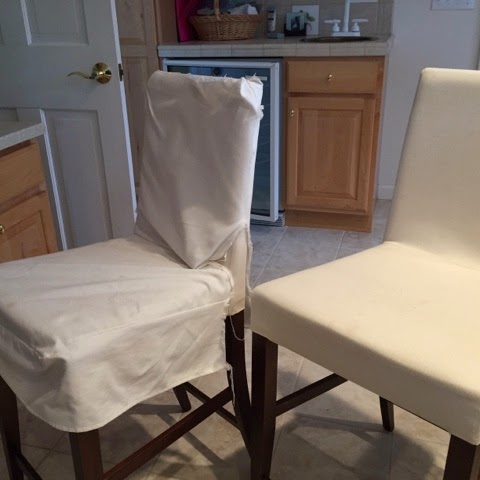
Meanwhile, these are the slipcovers for the counter stools at Sugar Hill. I fitted these from purchased covers a very long time ago, when I had no idea what I was doing, and serged them using a 3-thread serger, (what was I thinking?) So, this is how they've looked for many years. Note the complete lack of a slipcover on the chair on the right; that's not because I didn't make enough, it's because it must have failed in such spectacular fashion that it no longer even exists.
So, with the help of Craftsy's Cherie Killilea, I'm going to make nice slip covers out of rustic bleached linen that I got for a steal at 
http://www.fabrics-store.com/first.php?goto=big_fabric&menu=&fabric_id=15
where the regular price is $7.76 per yard, and I am quite sure I got mine on sale. 
So, without any further procrastination, I'm going to draft a pattern for my chairs and get started on this much-delayed project. 

Tuesday, February 10, 2015

Quilting with Linen

I have discovered a truth about quilting with linen. Here is a photo of strips I've cut out of Robert Kaufman's Essex linen/cotton blend.

As you can see, there are some very nice, clean strips on the left, stacked and unstacked, which sew up very obediently. On the right, there are two very shaggy, naughty looking strips, which do not behave on the sewing machine any better than they do sitting there for the photo. They are stretchy, noodly, messy things. The difference? STARCH. There are some quilters who insist on starching their fabrics once, twice, multiple times in order to end up with a fabric that acts more like cardboard than cloth. It makes for clean lines, but I've never, up until now, felt it was worth the bother.

Linen is special. It's a wonderful, supple, tactile treat, but it does not piece easily unless you tell it who's boss. Starch accomplishes that feat, and I am a convert. I'll wash the starch out as soon as I get this thing quilted, and after that, I expect a wonderful quilt with drape that is more dependent on the batting and quilting choices I make than the fabric choices. I'll let you know when I get there. I previously blogged that this Day Break quilt is a big project, but I think that was a bit of an understatement. It's HUGE. I've ordered a design wall that can be constructed in my sewing room and broken down when I'm done using it. It's 72"x72" and still won't accommodate this monster.

I might even have to quilt this quilt in two pieces. Don't ask me how I'm going to do that. Or frame the whole thing, quilt all but the edges, (there's a dead space at the edges of the frame into which the machine can't reach,) and then finish on a domestic machine. I'll let you know how I pull this off.

Saturday, January 24, 2015

WIP

It's been awhile. Here's what's on my sewing table:


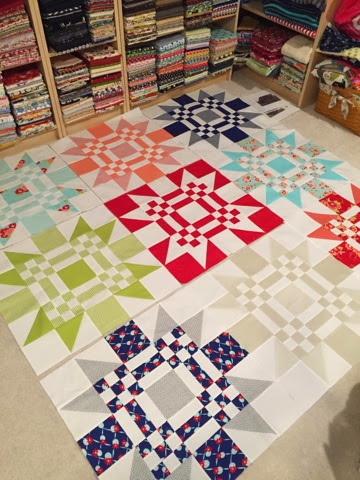
 I cut this out and couldn't resist starting it, as a diversion in the middle of many other projects. This is Red Letter Day with Miss Kate fabrics by Camille Roskelley, who is designing great patterns and fabrics that make me very happy, (see Thimbleblossoms.com.) Check out her great classes on Craftsy and her terrific video on youtube on 25 ways to arrange HSTs!!

She also works a lot with her mother, and I love that. It makes me think of my mom and how she shared this love of sewing with me, as well as passing on her textile addiction. 
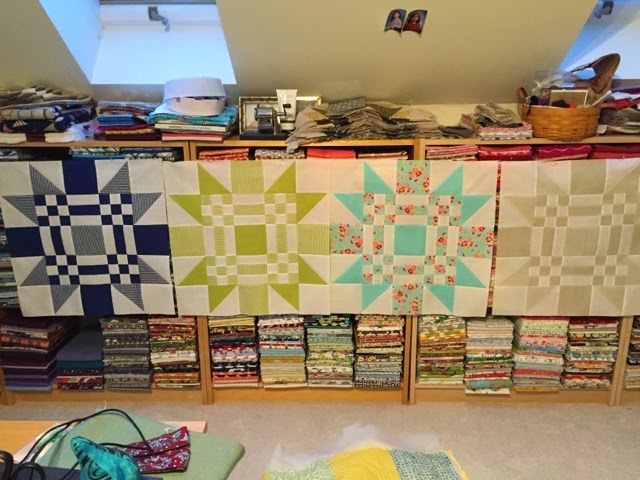
Remember how I put all those bookshelves in my sewing room, and was determined to fit all my quilting fabric in there? Well look at the top of those bookshelves now. It's getting out of control! To be fair, a lot of that stuff isn't fabric. My picture of my mom is hiding behind that old pencil sharpener. I need to find better places for the clutter.

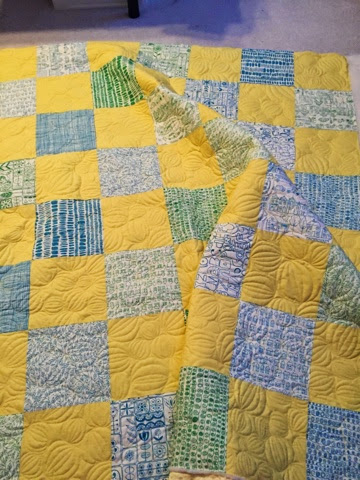
This is my Summertime quilt, which is developing nicely. It's a baby gift for Cali, Lisa's granddaughter. Yea for Cali!! Although I admit the piecing part isn't anything genius, I designed it to celebrate a bundle of fat eighths of Summertime that I won. I just put it on the frame and completely quilted it today. Those are beach balls, inspired by yet another craftsy class, this one The Secrets of Free Motion Quilting by Christina Cameli. 
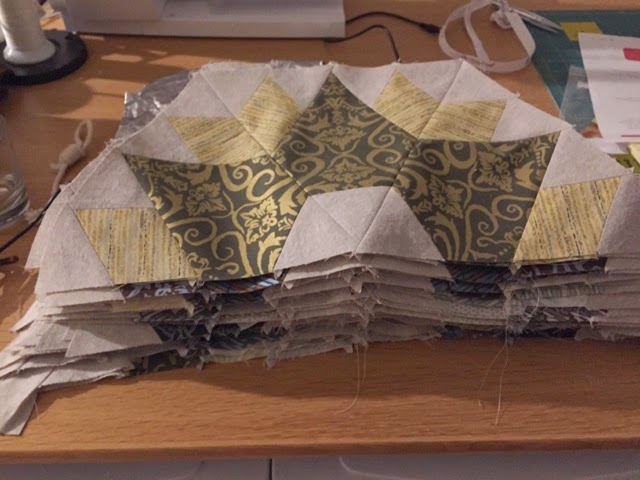
Here's my Day Break quilt, which is coming along slowly. Each pair of half-hexagons takes somewhere between 40-50 minutes, and I am enjoying the piecing process as a little bit of relaxing toil, but man, there are a lot of them!!! This is what I was taking a break from when I cut out that happy little Red Letter Day quilt, but it turns out it's not so little at all, but certainly very happy.

Have I told you yet? I'm addicted to Craftsy.com!!! I have 35 classes already, and I'm learning so much from great teachers. Some of those classes are for the girls, and others are for the future, like the Digital Photography class, but the rotary cutting class by Debbie Caffrey has already saved me quite a bit of time along the way with my rotary cutting. I'll use Debbie Caffrey's tips to make a Delectable Mountain quilt out of a layer cake, one of these days.


This is a lot of fun, and I started this before going to Cancun. Amy Gibson takes you on a world tour of quilting techniques, and I really am enjoying small bites of different techniques. That way if you run into one that feels tedious, you're almost finished as soon as you start, (ahem...applique.)


I couldn't help but think of Jane while watching this. I want to increase my Continental Knitting comfort and speed up my knitting. This is a great class, and it seemed to be made expressly for me.


This is a crazy, artsy, no-holds-barred class in stacking a bunch of fabrics, sewing a pattern onto them, and slashing pieces away to reveal the layers. It's a lot of fun, and I can't wait to get started using some interesting fabrics and making wall-hangings. I especially like the part about embellishing after the slashing is done, and I am inspired to take Carol's other class, called Stupendous Stitches. I wonder if I should wait until I retire and buy an embroidery, wider machine first, but I'm really loving my Bernina QE440.


 I like Camille Roskelley's class, though I don't think I learned very much from it. It's cute, and she's adorable, and I'm going to look at it again another time. 

Saturday, November 22, 2014

Progress

Not that there's any down side to it, but I have been sewing projects that were already started back in early November, and haven't cut any new projects though they are listed as "started" because their concepts are fully developed. I received packages from Craftsy and other companies that included a lot of fabric AND thread.
This was a photo  texted to me from Constantine with the caption "quilting gone wild." It's usually my plan to receive and open packages before he gets home but I won't become a wife who feels the need to conceal addiction. He's got his, too, believe me. 
If you knew how much thread I already owned, you would consider institutionalizing me. BUT these packages of thread are so incredibly beautiful and of such high quality and SUCH a great bargain that I indulged myself. Also contributing to my self-indulgence was Constantine, who said I should buy them, having no earthly idea what my current thread stash looks like.


These threads are incredibly high quality but are very dear. Normally selling for $12.50 a spool, these were on sale for $84.50 each, which is admittedly still an outrageous $7 per spool, but oh! you should see the colors in person. $170 is about what an hour of therapy costs, and this is maybe 4 times the boost of an hour session. Welcome to my delusional world of rationalization. It's comfy here!

11/25/14
I've cut the main pieces of my Day Break quilt. It's a monster king size quilt at this point since I want it on my bed, and for the first time, I actually care if it fits. 
This quilt is going to be a major production but it really deserves to be done up BIG.